Progress in Research and Planning
Prelim
From looking at our prelim task, we did not have the range of initial ideas that we had for our final piece. We used this prelim to practise our composition of shots and camera angles in order for us to be confident when selecting techniques that we would want to later use.
The techniques that we used did not relate to our chosen genre as at this time, we had none. With this, we had no plan and had not even considered music as this was just a practise. The dialogue used was roughly scripted so that our actors knew the basis of how the seen needed to plan out.
Final Task
To do our final task, we looked at many openings of films and looked into how they had specifically targeted both genre and age of the audience in just the first 2 minutes. We also picked up on the standard techniques that the genre uses in relation to camera angles, sound, editing and mise-en-scéne.
In planning our final task, we drew out each individual camera angle that we were planning to use as this later helped us when we started to film. We too looked into how much dialogue appears in the opening of thrillers which is quite minimal. We also researched the type of music we would need to use in order to create an eerie atmosphere that is common within a thriller.
Progress
Our prelim task helped us focus on the specific areas that we were poor on such as panning shots. In our final task, we made sure that when using panning shots, we chose someone with a steady hand that would move the camera smoothly. Shot reverse shots are common in thrillers and were a key feature in our film as it establishes the initial relationship between the two female characters.
Progress in Camera Work
Prelim
We used the tripod but we weren't familiar with it yet so we had trouble adjusting it to the angle and/or level we wanted.
Screenshots of oupoor camera work on our preliminary task:
 |
| Hands in view on left |
 |
| Poor framing |
 |
| Again the tripod is tilted and framing is poor |
 |
| This shot has Hanisha's hair blocking some of the lens |
 |
| This is a poor shot-reverse-shot as Hanisha is nearly blocking the camera lens |
There were also jolting shots - we were not familiar with using the handle and swivel so went we did the panning/tracking shot, it didn't appear to be smooth.
Screenshot of shot-reverse shot - continuity error, Hanisha and Shannen stay in the same side despite being in different over the shoulder shots.
Lighting - we had problems with backlighting.
Over the shoulder shot - there was no shoulder, we only had part of Hanisha's hair.
Final Task
Using the camera often, with a bit of practise, we were comfortable with using it.
We learnt how to loosen the swivel and the handle for a smooth panning shot.
We took more time in levelling out the camera for a straight angle.
Lighting - backlighting problem solved by considering in making the room brighter by turning on all the lights and closing part of the curtains.
We improved filming our shot-reverse shots by considering where people's positions were and what they will be in a different shot.
Screen shots of better camera work in Final Task
 |
| Curtains pulled to help back lighting issues |
 |
| Two shot of the sisters |
 |
| Shot reverse shot showing a conversation |
 |
| This long shot shows the aggression through Ellie's POV |
 |
| Transition between dreams and reality |
Progress in Storyboarding and Script
Prelim
For our preliminary task, we didn't create a proper story board but we did put a small script together so that each character would know what to say and it would flow for us to see what we were doing wrong or right. We filmed our task in a classroom were the tables and chairs were situated in awkward positions and we hadn't planned where we were going to film which could be another reason why the camera angles are strange.
Final task
For our final task, we created a story board which we decided to alter a few times to make it flow better. The storyboard showed to us where we had to change certain aspects of it.
When we put the animatic together, it allowed us to experiment where to put certain pieces of music and dialogue.
We also knew where certain locations were going to be.
Progress
because we made sure the animatic and storyboard, it meant that things went smoothly on the day of filming.
We followed the script well meaning weren't improvising on the day.
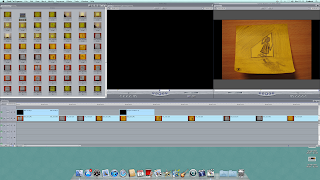
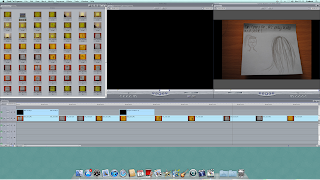
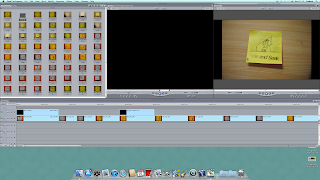
Screen shots of our animatic:
 |
| The animatic has captions of what we had intended to put at that part of the extract |
 |
| Shot / reverse shot sketched and planned |
 |
| Thought about camera angles |
 |
| Dialogue was thought through |
 |
| The arrow shows the intended movement |
 |
| This has a focus on sound |
 |
| This screenshot has where we intended to put the movie title |
Prelim
When we used Final Cut Express for our prelim task, we did not have much experience in using the software. This meant that we were still learning how to use the software so the editing that we did was not of a high standard.
There were several different problems we encountered whenusing Final Cut Express, for example we did not know how to close the gap properly, so therefore we had to manually close the gaps which sometimes was not accurate. Another problem that we encountered when editing is that we kept cutting the piece in the wrong places at one point our prelim task we cut Hanisha out completely, which would be seen as her leaving the scene, when in actual fact that scene carries on and she is still in it.
In our prelim we did not use any sound or include music or titles and credits so we did not have any experience in putting our titles and credits in. We also did not have any music in our prelim so when it came to the real piece it look a long time to search for the right music and put it in at the right places and to make sure that each cut of music fits in with each cut of our piece.
Final Task
When it came to editing the final piece, it took a couple of lessons to get into the swing of constantly editing, but when after about one week of editing, we got into the swing of it, making progress quickly. Once we had the rough cut of our piece, we all took it in turns to make adjustments to the piece to make sure that it was up to the standards that we wanted it to be to.
When editing our final piece we used lots of layering to make our piece more effective to ensure that we achieved what we intended our outcome to be. We built up layers of sound as we had different music playing at the same time. We also had music and dialogue playing at the same time so there was sound layering where this occurred.
We were a lot more careful with continuity in comparison with our prelim task. Especially when we were editing match on action shots. We took into consideration when the character was in frame and making sure that each shot linked perfectly. We did this by enlarging the tracks to check we were cutting at exactly the right moment for matches on action.
We used different effects and transitions in our piece to make sure that it flows smoothly and to allow the audience to understand the general mood of the piece, for example a fade of non-diegetic music is used when the younger sister is hiding to make sure the audience knows that something bad is going to happen. It also creates an atmosphere which tells the audience how to feel depending on what type of music is being played at each point during the piece.
We used a different program to make the title and credits, called Live Type. Once we made the titles and credits we transferred them over to Final Cut Express and put them in the places allocated for each title and credit. Once we did this we became a lot more confident in our piece. The comparison to our prelim task has such a big gap as we would not have been able to add in titles and credits as we did not have much experience.
Progress
We can see a significant amount of progress that we have made form our prelim task to our final task. We have improved majorly when it comes to editing. We have much more understanding of the potential of the editing packages and how they can be combined. Our editing is a lot more accurate compared to the editing of our prelim task and it is very clear to see this. Final Cut Express became a lot quicker and more efficient to use as we used it a lot more frequently in our final piece.


No comments:
Post a Comment